
The world wide web is 25 years old. It has radically transformed our culture, from the way we disseminate information to the purpose of a cell phone. I’m older than the web, and I have not made any significant cultural contributions. No, I’m not jealous.
Links are just about as old as the web. As long as there has been a web, there have been hyperlinks that point users from one webpage to another.
In the 25 years of the web’s life, it just keeps getting bigger and bigger. Suffice it to say, there are a lot of links out there. And not all of them work anymore. A LOT of them are broken.
There are a plethora of reasons a link may no longer work. Maybe the domain the link points to is expired. Maybe the webmaster accidentally messed up the html code upon formatting. Regardless of the reason, broken links happen.
In case you missed it, Keyur Lalani wrote a wonderful cheat sheet on broken link building on this blog yesterday. In the middle of this article, Lalani talked about his favorite broken link finder. To tell the truth, I had never heard of that one until I read his article. Even experienced SEOs learn something new everyday, or at least they should.
I love broken link building. As Lalani says in the article it’s, “One of the most powerful and easy link building techniques available.” With all of the broken links that populate every corner of the internet, there is potential for a slew of linking opportunities for any site.
Today, I’m going to expand on this section of Lalani’s article, and explain how to use the three broken link checkers I’ve grown accustomed to during my time as a link builder.
- Check My Links
- Domain Hunter Plus
- Check Broken Links
Step One: Adding a Broken Link Finder
All three of the broken link finders I will be using are available for free on the Chrome Web Store. Search for any of the three in the Chrome store and click on the name of the tool you searched for. A description of the tool will pop up. In the upper right hand corner, it will give you an option to “Add to Chrome.”
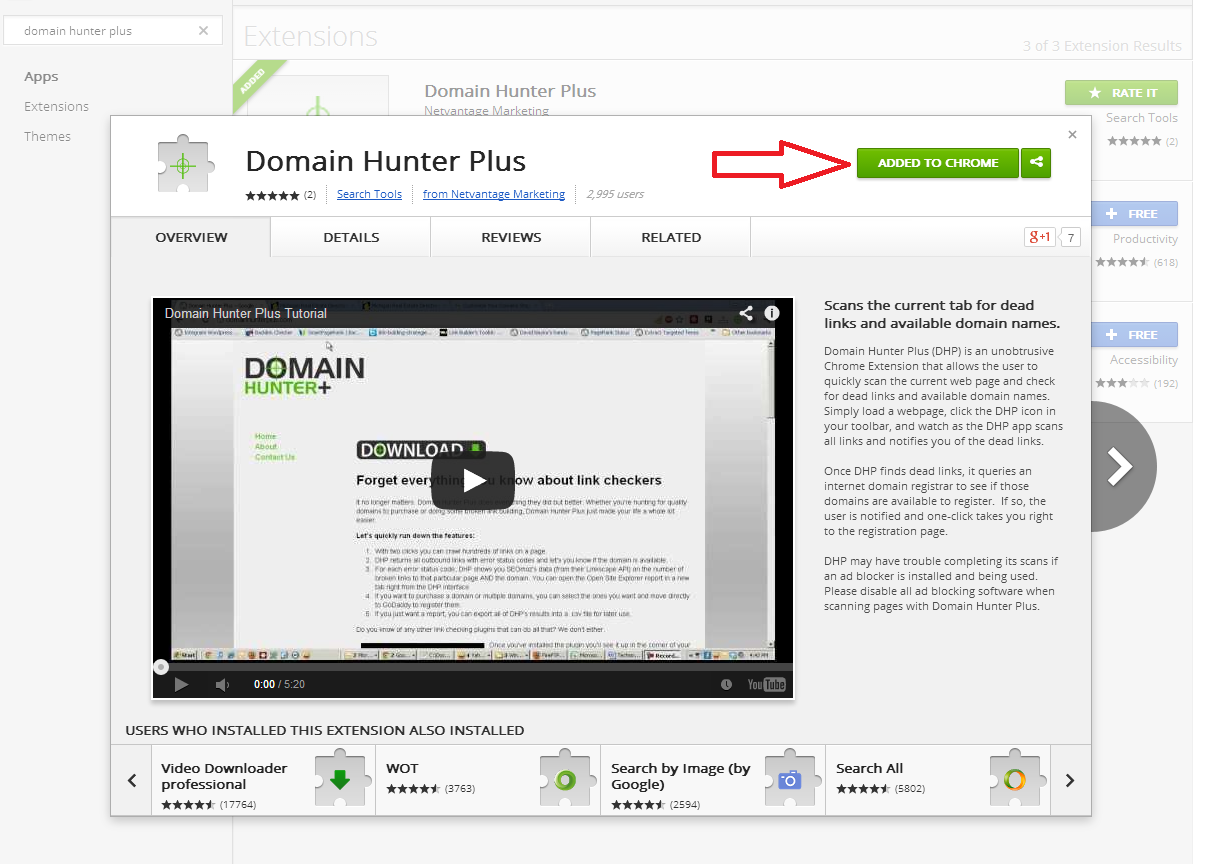
I’m using Domain Hunter Plus as an example, but it’s the exact same process for all three. Once added, all of these will move into your extensions.
Step Two: Finding Broken Links With Check My Links
Let’s take a look at a page with some broken links. For example, the CNN homepage.

Click on Check My Links in your extensions. Your extensions are at the top in your toolbar.
 The green arrow is pointing at the extensions icon.
Once you click on Check My Links in your extensions, it does the rest of the work for you. A small square will pop up in the upper right.

Check My Links counts all of the links and then divides them into working and broken links. Not only that, but it will highlight the links. The working links are highlighted in green, the broken links are in red.
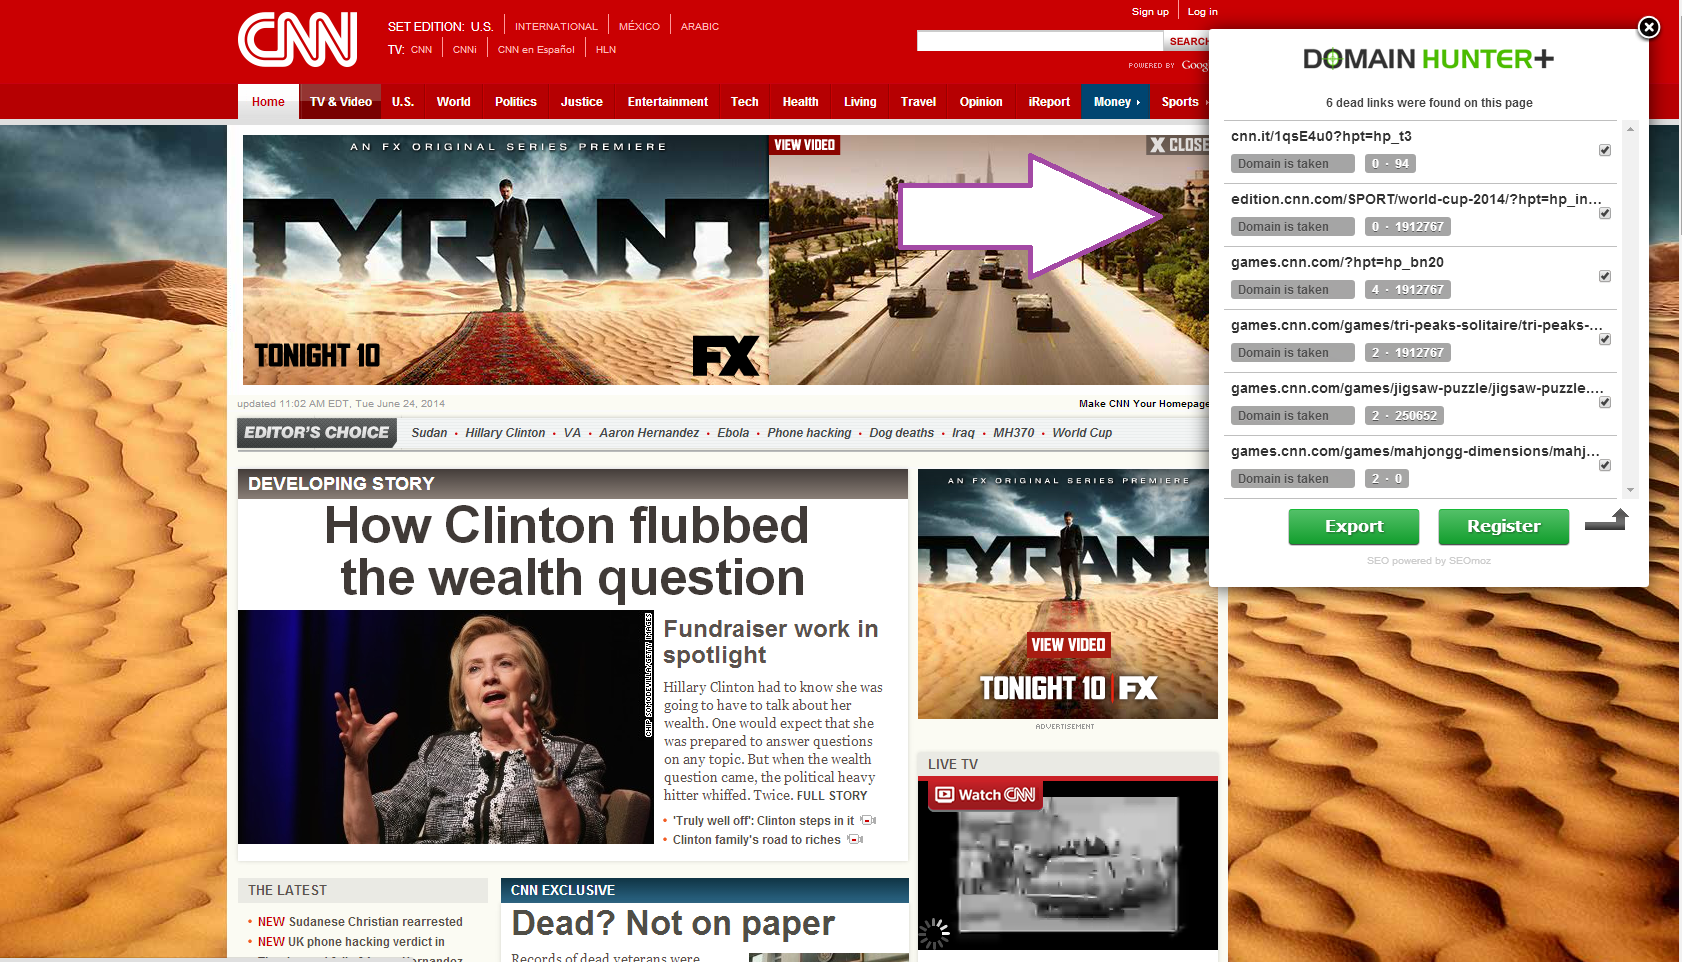
Step Three: Finding Links With Domain Hunter Plus
Like Check My Links, Domain Hunter Plus does the work for you after finding it in your extensions. A rectangle will pop up in the upper right corner while it processes the links. After it’s finished processing the information, Domain Hunter Plus will spit back a report of the broken links on the page.
Domain Hunter Plus does not highlight links. However, when you click on a link in the report, it will send you to Open Site Explorer. For example:
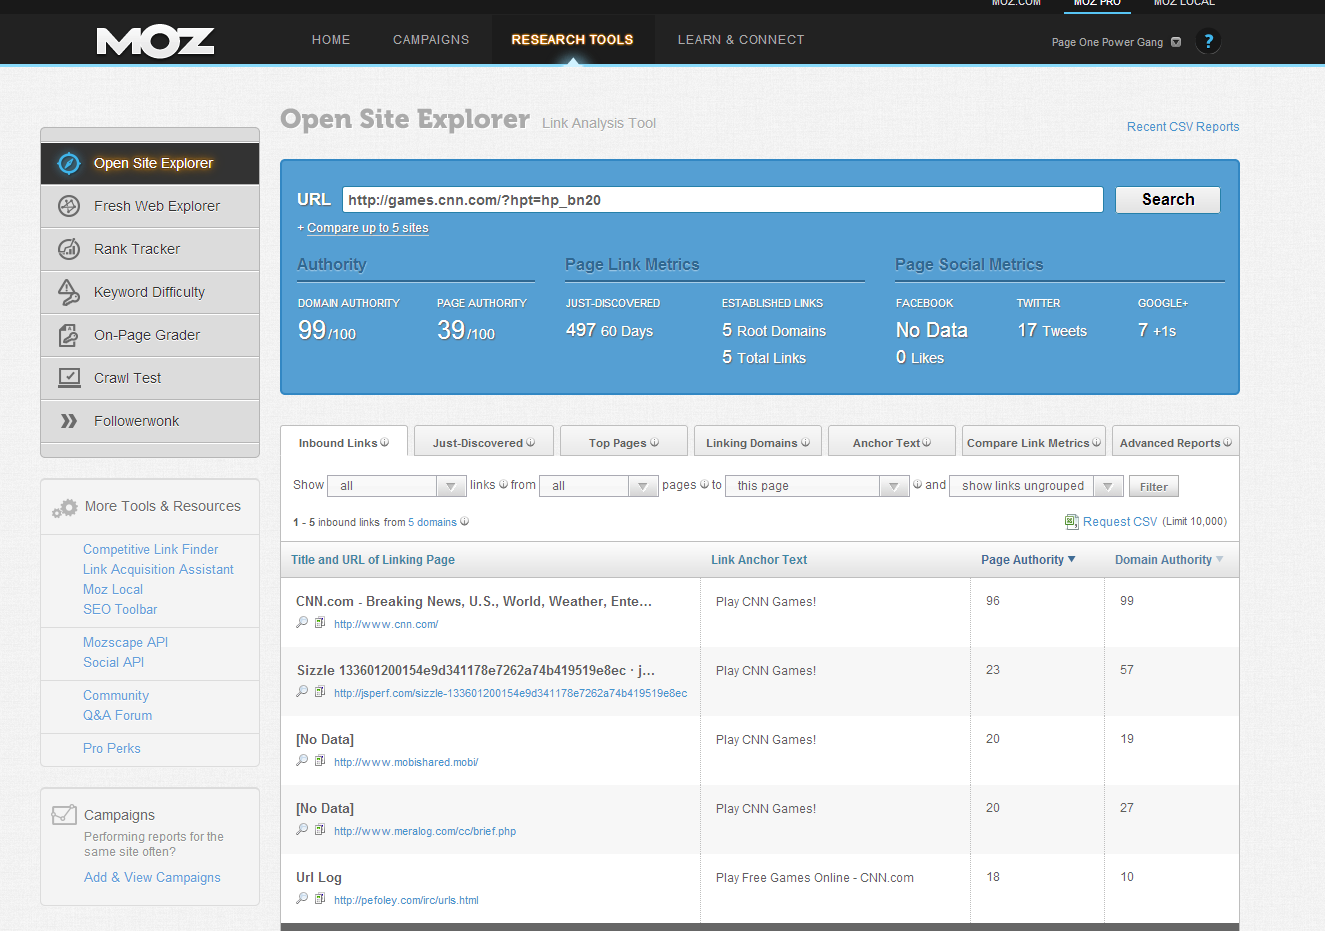
Note: This is the third link on the Domain Hunter report
This Open Site report shows me a list of other links to that same page. Some of these links may be broken too. Open Site is essentially giving you a list of potential broken link prospects, which is much easier than finding them yourself. In order to see the Open Site report, you will need to pay for a subscription to Moz however.
Step Four: Finding Links With Check Broken Links
Check Broken Links does not work like the other two. It doesn’t work on the page you are analyzing. Instead, it will automatically take you to a different page while it processes the links.
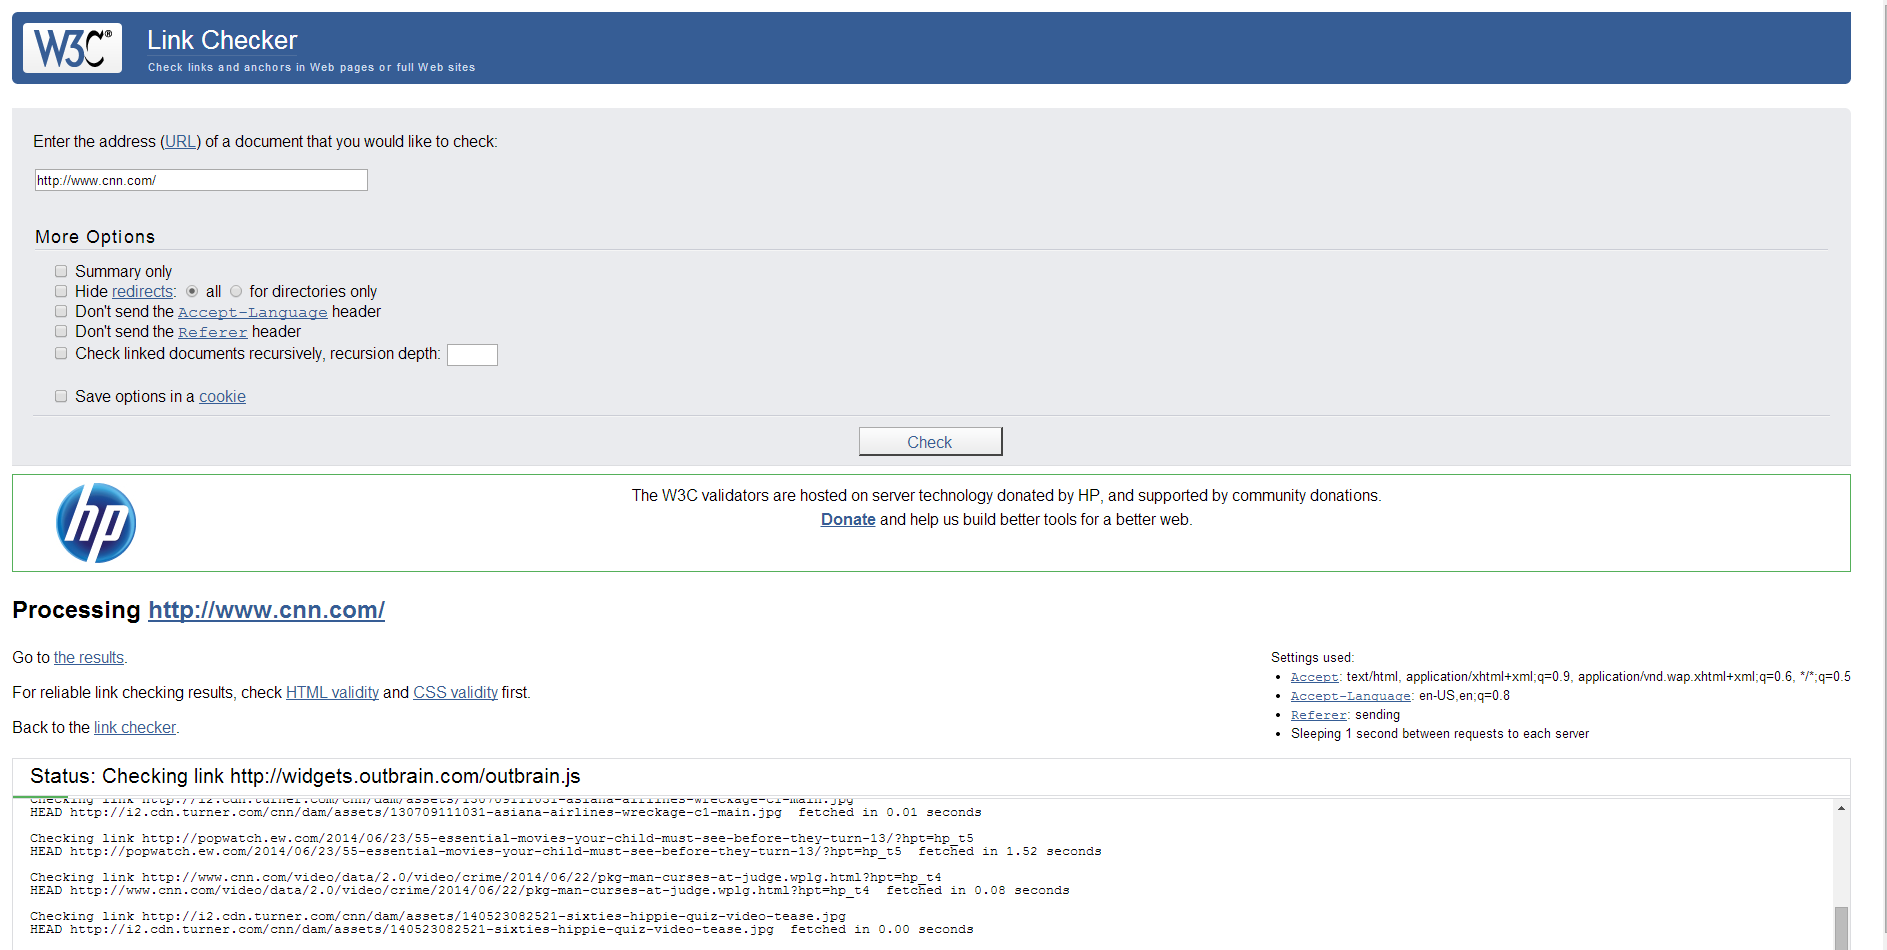
You can find it in your extensions, much like the first two tools, or you can go to http://validator.w3.org/checklink and simply plug in the URL of the page you want to examine as well.
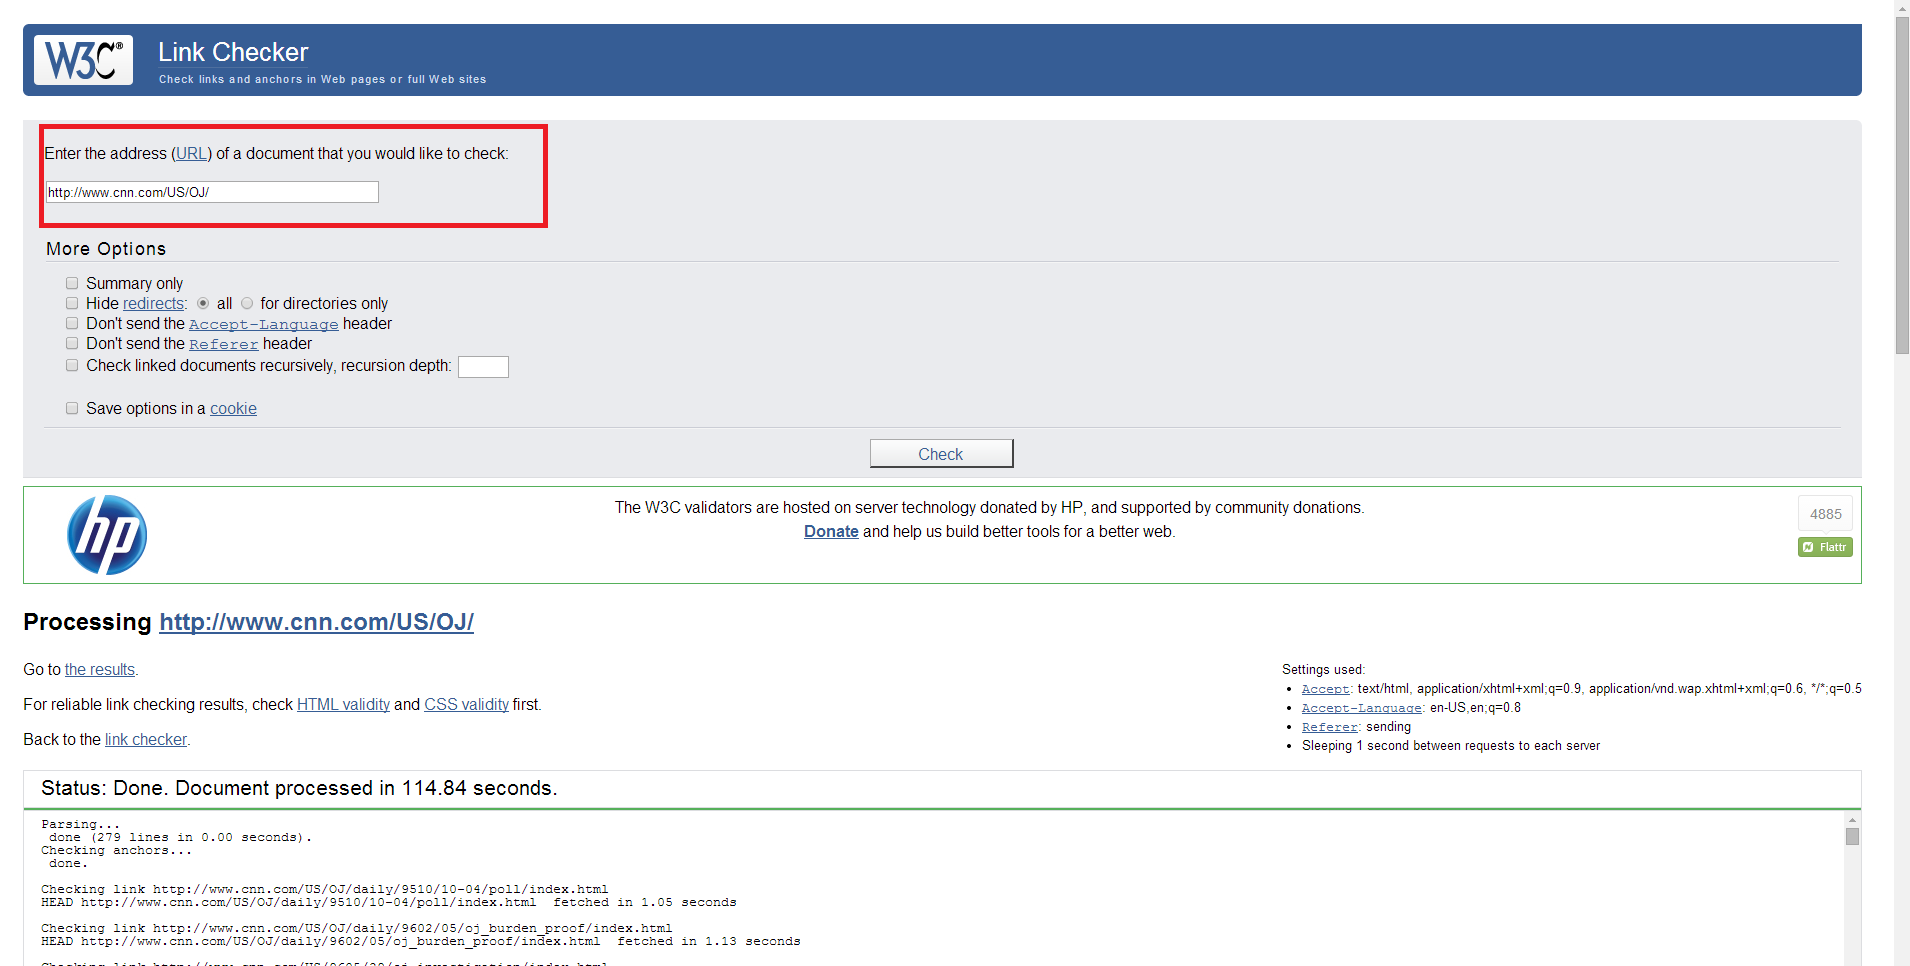
At the bottom, Check Broken Links will give you a detailed report of every broken link it found on the page.
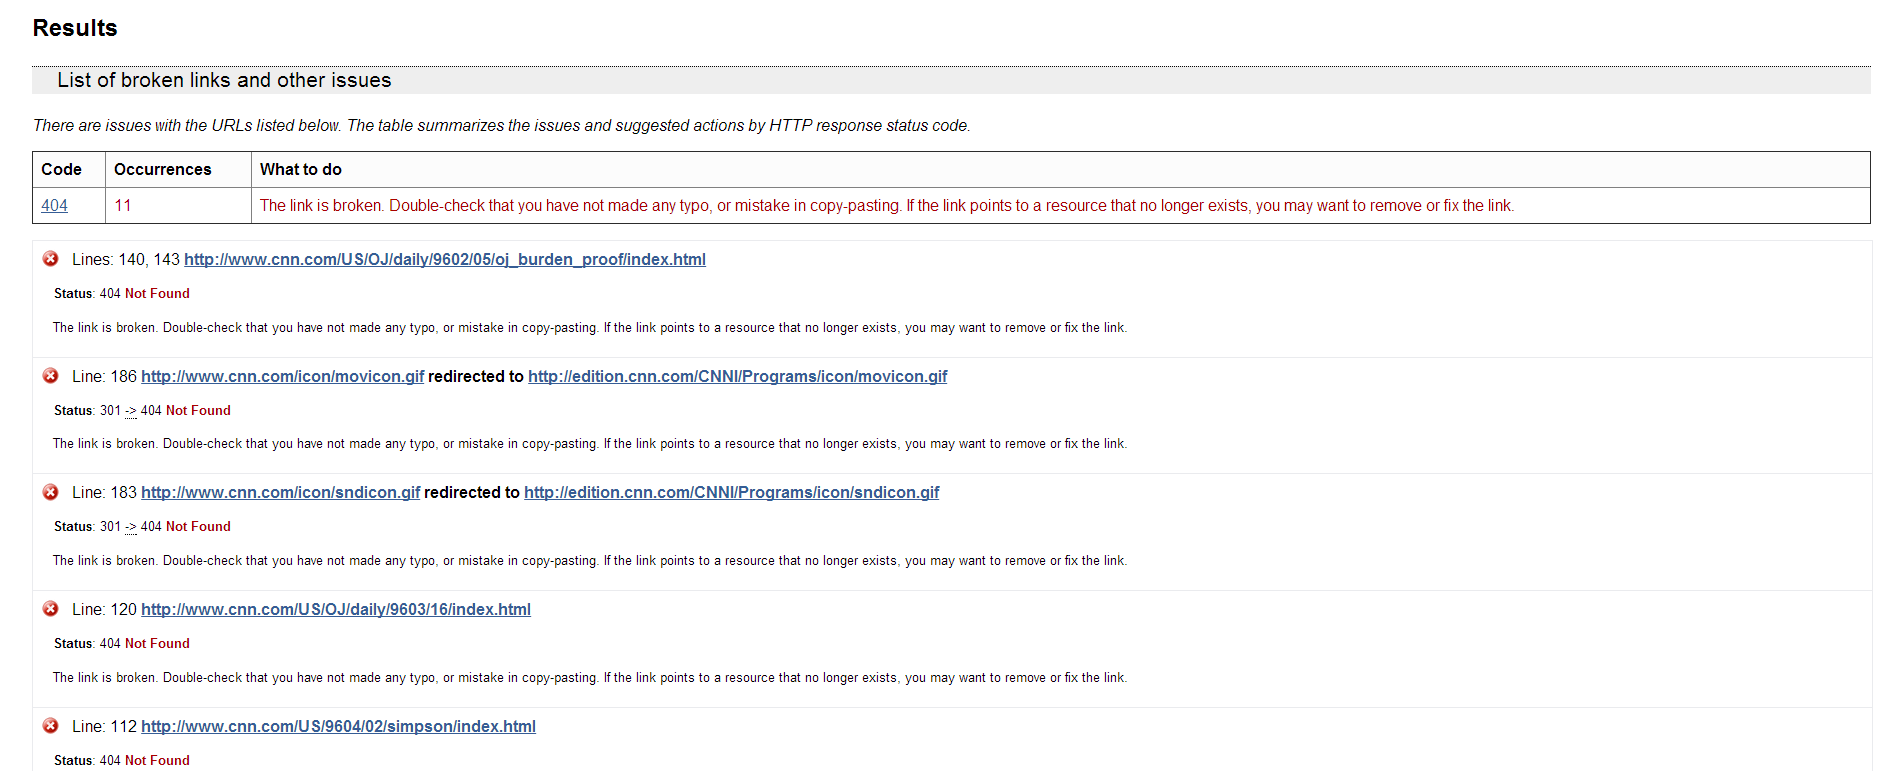
It will tell you where the link is and the standard response code.
As cool as this is, this may be the least convenient option of the three tools. Check My Links and Domain Hunter Plus analyze a large amount of links in a matter of seconds; Check Broken Links can take several minutes. This is the biggest drawback of Check Broken Links
Step Five: Pros and Cons of Each Tool
This leads me to the pros and cons of each tool.
| Check My Links | Domain Hunter Plus | Check Broken Links |
| Pro: It’s very quick, and it highlights all broken links | Pro: The fact that it links to Open Site Explorer is a big plus | Pro: The thorough analysis of each broken link is wonderful |
| It doesn’t offer a report of any kind on the links. You have to look for them on the page | Con: It doesn’t inform you where the link is. On a site with a vast amount of links, it could be hard to find one link | Con: It takes much longer to analyze the links than the other two tools. Also, it’s not an on page tool; you have to flip through different pages |
Whatever tool you use, broken link building is one of my favorite link building strategies. It’s easier to fix a link that’s already built than to start from scratch.